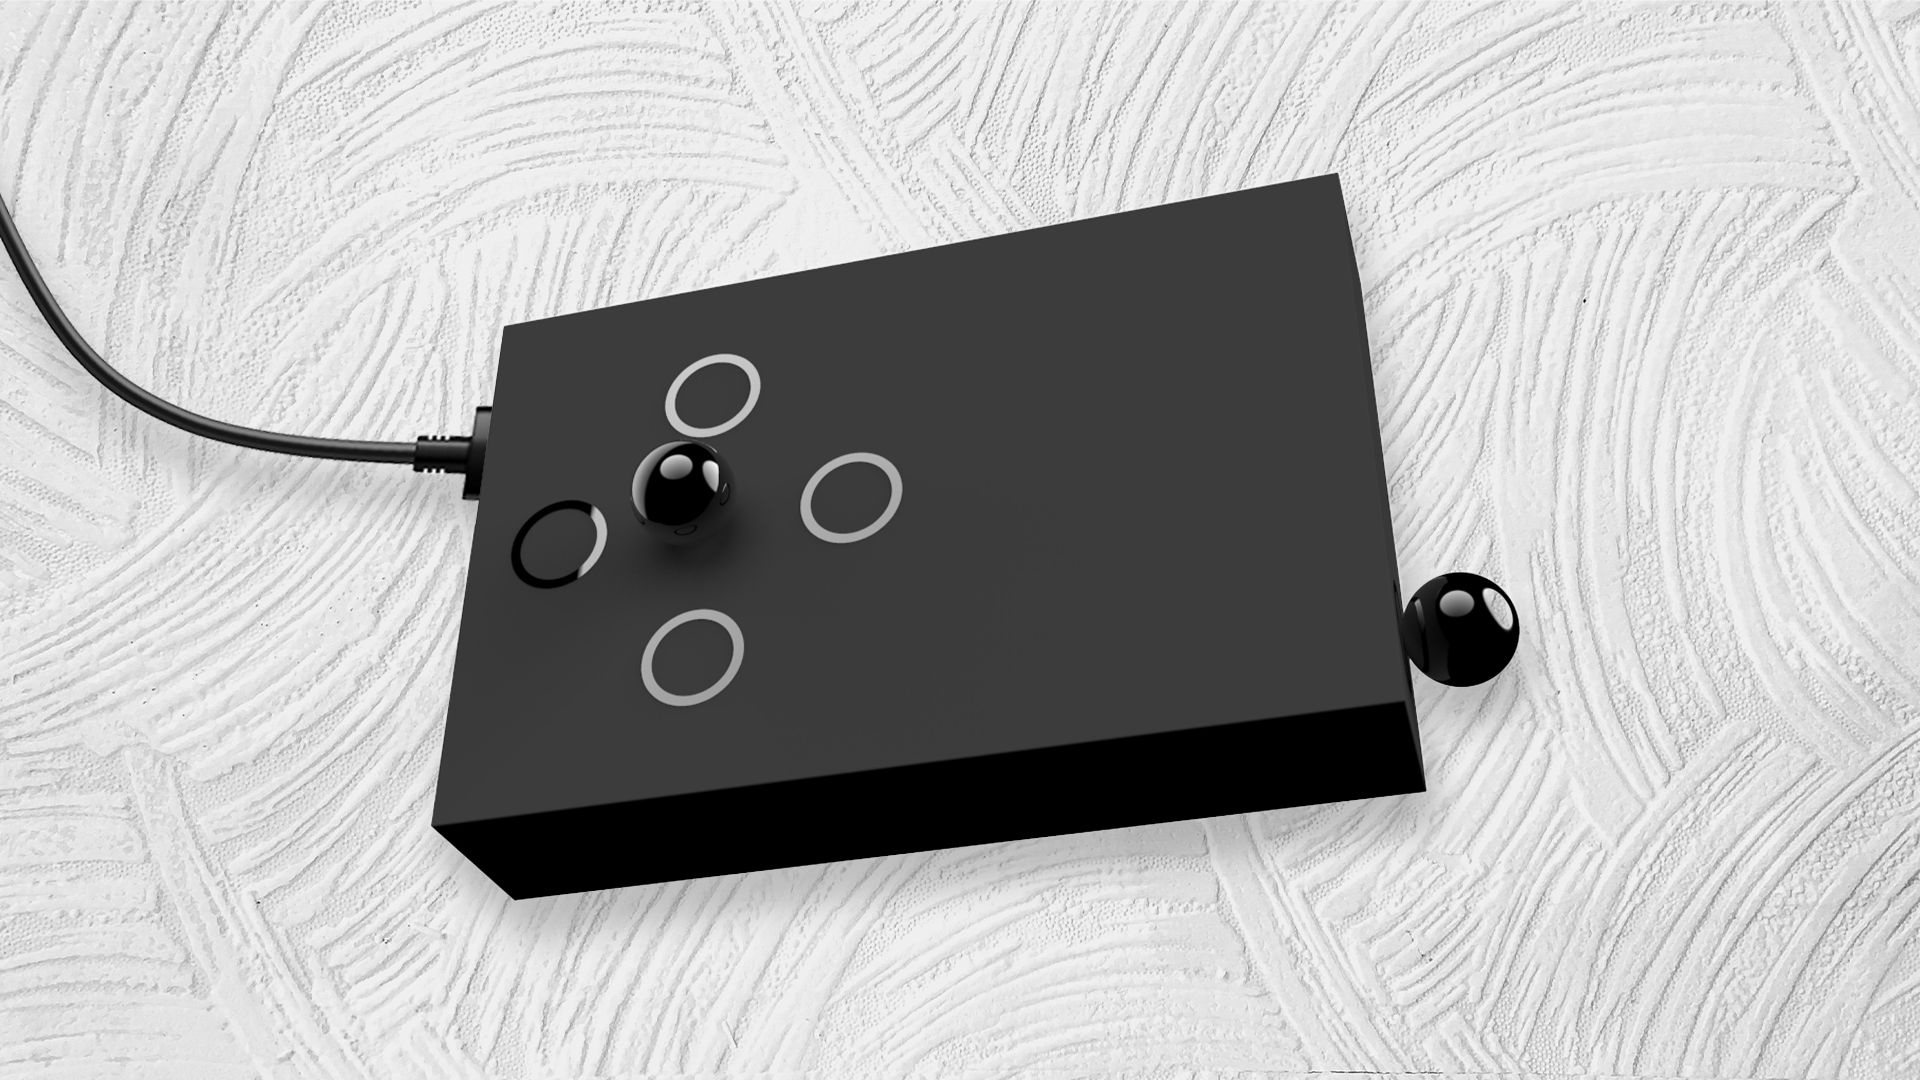
An Attractive Controller
1. Pleasing or appealing to the senses.
”An attractive controller”
2. Relating to attraction between physical objects.
”The attractive force between the magnets and the metal plate”
At A Glance
Top View
Side View
Close-Up View
About the Project
Rethink the concept of our everyday controller. Design a unique controller (up to your interpretation) for a pre-programmed snake game with Arduino Uno.
An <adjective> controller.
NUS, 1D1115 Design Fundamentals
Process & Development
In preparation for this project, we were given some time to learn and familiarise ourselves with the arduino uno during class. Above shows the progression of the circuit set-up of my controllers.
Materials include:
Arduino Uno
Copper tape
Foam
Magnet (ball) x2
Magnet (flat) x2
Magnet (strip) x1
Mod Podge
Wires
Paper box
-
int pinA = 3; // define digital pin number
int pinB = 4;
int pinC = 5;
int pinD = 6;
int pinE = 7;
int buttonValA = 0; // declare button value variables
int buttonValB = 0;
int buttonValC = 0;
int buttonValD = 0;
int buttonValE = 0;
void setup() {
pinMode(pinA, INPUT_PULLUP); // set pin to INPUT_PULLUP
pinMode(pinB, INPUT_PULLUP);
pinMode(pinC, INPUT_PULLUP);
pinMode(pinD, INPUT_PULLUP);
pinMode(pinE, INPUT_PULLUP);
Serial.begin(9600); // begin Serial communication
}
void loop() {
buttonValA = digitalRead(pinA); // read digital pin value
buttonValB = digitalRead(pinB);
buttonValC = digitalRead(pinC);
buttonValD = digitalRead(pinD);
buttonValE = digitalRead(pinE);
if (buttonValA > 0 && buttonValA < 2) { // if button value is 0, send a text command over Serial
}
if (buttonValA == 0) {
Serial.println("1");
}
if (buttonValB == 0) {
Serial.println("2");
}
if (buttonValC == 0) {
Serial.println("3");
}
if (buttonValD == 0) {
Serial.println("4");
}
if (buttonValE == 0) {
Serial.println("5");
}
delay(30); // delay for 30ms
}
There were 2 mock-ups done prior to the final controllers to figure out the size, materials, and coding. Key changes includes the usage of black wires in replacement of bulky crocodile clips and the placement of the controller keys (magnetic balls).
I kickstarted the project by building the base with one side of a box cover. Held together with superglue, I ensured that it’s sturdy enough before mapping out the area where I would like the magnetic ball to move with the magnetic strip.
While I let that air-dry, I flipped the box over to paint 5 circles with Mod Podge. These 5 circles are visible markers for users to know where to shift the magnetic balls in game. They act as “buttons” – up, down, left, right, and reset. The tricky bit was to nail down the gloss effect as I have made a mistake in my first mock-up with clear nail polish. The polish was tacky, and hard to control in comparison to mod podge, which dried clear and flat. To speed up the drying process, a hairdryer was used.
Next, I wrapped the flat magnets in copper tape, and began to line them across the (already dried) magnetic strip on the underside of the box. They were arranged strategically to touch the wires connecting to the Arduino Uno board. After attaching all wires, I connected them accordingly to my circuit layout (see above) and covered up the box with a perfectly trimmed piece of black foam for a seamless look.
The project does not end here after the controller is built!
For post-processing, I headed to the photography studio. A friend of mine helped with the shoot as we figured out which are the best angles to showcase the final controller. I went 1 step further to recreate it on Rhino, Keyshot, and photoshop for a polished look.
Food For Thought
Time has passed really quickly in this module!
I remember struggling a lot during my first two weeks as I found coding tough. I was confused on the difference of the various sensors, especially between touch and button as I thought they worked hand in hand (isn't button operated by touching it?) and how to read the codes on processing and arduino. I did not understand how to manipulate them besides changing the colours haha.
I remained hopeful that I would learn along the weeks naturally and I really did! I enjoyed the mini class activities where we had to go around school to search for good/bad affordances with my peers and also the mini group projects too. It was through these small interactions that my interest and skillets in arduino grew.
As I compile my 3 controllers, I could really see my personal growth. Though my circuits and codes remained the same throughout, it was a challenge to built the controller's appearance and take inspiration from what's around me.
I remember searching for items to house the wires and crocodile clips. The crocodile clips gave me so many problems during controller 2, which fueled me to purchase the thinner black wires and learn how to solder and work with it for my final. In comparison to my first controller, my final controller was SO MUCH better. I am quite proud of my final work!
All in all, I liked how I had the creative freedom to dictate what concept I wanted to go for my controllers. This module was like a breath of fresh air and I would have never expected myself to enjoy the "engineering" side of design when I am a branding/graphic designer before entering NUS. It was also really interesting to see how everyone's controller turned out so different from one another's. The game festival was really eye-opening! Looking forward to future projects that may use arduino!


